
Overview
Hello and welcome to the first part of my C++ DLL series. We’re going to start off very basic and proceed slowly with the hope that no step leaves you puzzled or stuck. At the end of this series you’ll have a good grasp of how to create a DLL, link a DLL to your project, and hopefully a bit about how DLLs work. A rudimentary understanding of C++ is assumed, and if you’ve successfully written a few toy apps in C++ then you’re ready for this tutorial.
DLLs are great for encapsulating a bit of independent functionality that makes sense by itself. This independence allows you to switch out the functionality’s logic (by replacing the DLL with a new one) without needing to recompile your application (provided that the things that the DLL makes available don’t have signature changes). It also allows you to give other developers access to functionality without giving them your underlying source code (which might be proprietary). The biggest advantage for me is that having a DLL in my projects creates a hard conceptual barrier between core functionality and presentation. I usually always start my projects as two components, one view component (like a console app or form) and one DLL that everything goes into. In the early exploratory phase of a project I try to fit everything into the DLL and anything that doesn’t make sense there gets moved to the view component. When things are wrapping up I usually do a series of refactorings where I move things from the DLL to the view that won’t be useful in any other projects. This process has made my life a lot easier on multiple occasions.
The following walkthrough is going to provide a look at the Implicit Linking of DLLs from C++ within a Microsoft development environment. Implicit linking requires having access to a DLL as well as its header file and lib file. When a program uses Implicit linking it hardcodes references to the DLL into itself that must be resolved when the program is first loaded (at the beginning of execution). If the DLL is missing then the program won’t be able to load and run and you’ll get an error message from the operating system. This is different from Explicit Linking which loads the DLL after the program has already started running (this will be covered in part 2 of this tutorial). If you’re curious and want more details on how these linking methods are different, here’s a comparison of the two.
Although there are a number of fine IDEs out there, I’m going to use Visual Studio 2012 in this series because it has some quirks that are worth explicitly noting.
DLL Project Setup
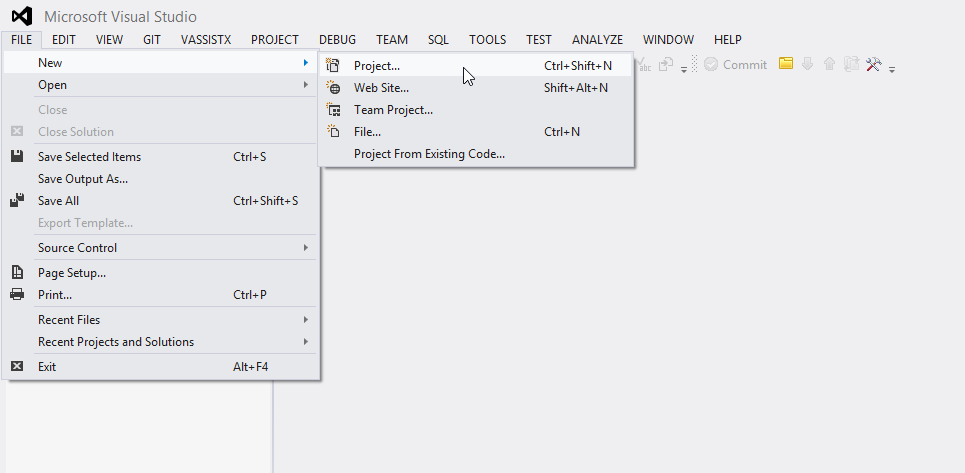
To begin, create a new project
You’ll be presented with the following set of choices.
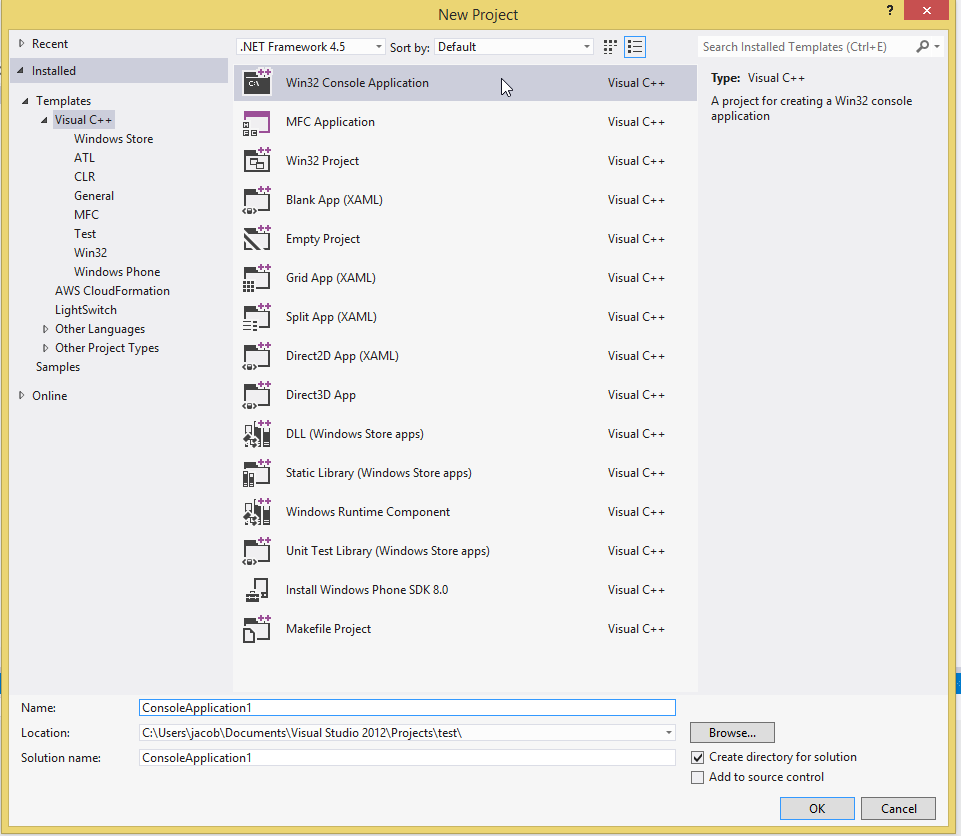
There are actually two ways of getting VS2012 to set up a DLL project from this screen. The differences between the final results of these methods are almost indistinguishable and functionally identical.
The first is to select DLL (Windows Store apps) which will create a project where all the files exist at the same folder level (the headers and the cpp files won’t be separated into subfolders).
|
Choosing the DLL option
(flat project structure)
|
The subfolder structure from making the project the other way
|
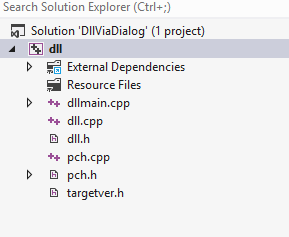 |
 (This is a DLL despite being named ConsoleAppllication1)
|
There are no further choices to be made if you select DLL (Windows Store apps) and you’ll be dropped right into the main code editor. By the way, there is no Windows Store apps restriction when you select this option, although you will be prompted to get a developers license so you can publish to the Windows Store. You can just Cancel the nag window that asks if you want to get a license with no negative effects to your development experience.
The second way is to select Win32 Console Application which will give you this screen of choices.

If you select the DLL option then the Export Symbols checkbox will become enabled.
If you choose to Export symbols then your project will start with an extra header file that has the same name as your project. Since I didn’t change the name on my project, and the path that got me to the DLL was through the Win32 Console Application option, my project is misnamed ConsoleApplication2. You can see how this name propagates into the header below.
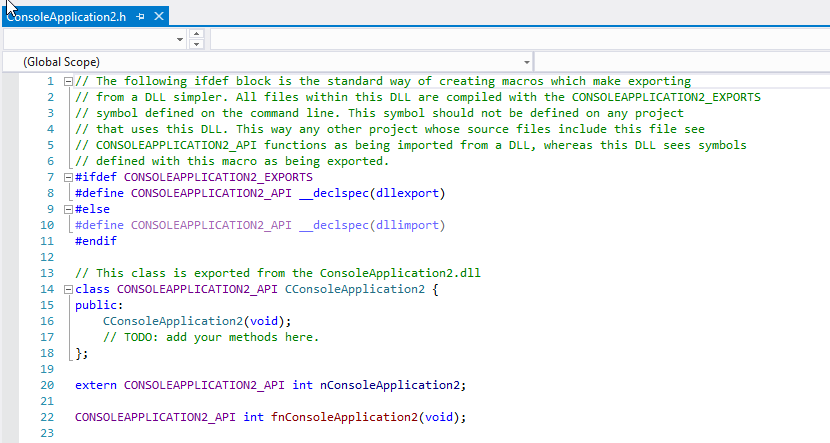
Lines 13 through 22 are some example code and a byproduct of having not checked the Empty Project checkbox when we chose to Export Symbols. If we had chosen Empty Project, then only lines up to 11 would exist. The definitions for the example code parts also exists in the project within the cpp file.
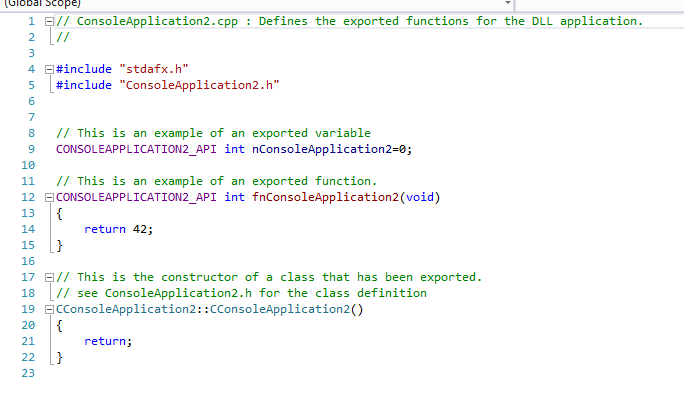
The example header code declares an integer, a function, and a class. These will all be made accessible through the DLL. The preprocessor directive #declare aliases the word CONSOLEAPPLICATION2_API to __declspec(dllexport). It’s convention to use the the preprocessor alias but you could just as well write the following.
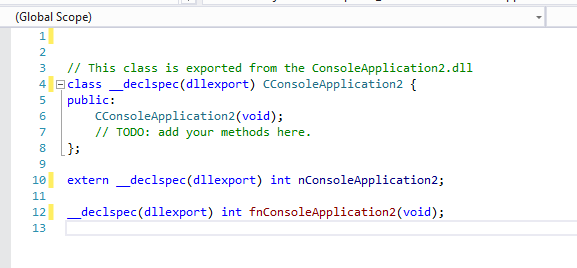
__declspec is a Microsoft specific add on to the C++ language and has a fair number of keywords that can be used with it. I’ve only ever seen dllexport and dllimport, and although that could just be sampling bias, it may be a byproduct of the confusing documentation for the __declspec keywords. We’re going to use dllexport when creating the DLL, which is good for all our data types and denotes that our DLL will provide the function, object, or variable to whoever uses the DLL. Part of the out-of-the-box setup of the above DLL code is that the preprocessor directive that enables using dllexport is enabled by default.
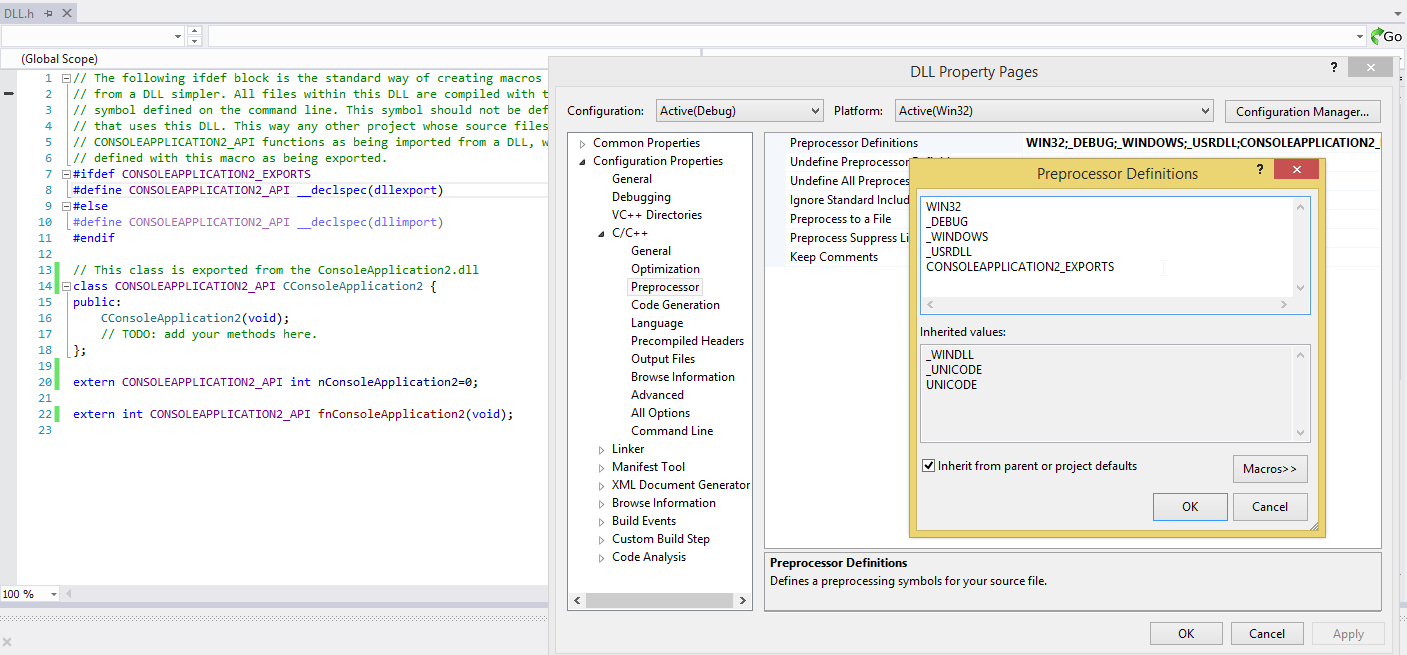
To the left you can see where the preprocessor conditional #ifdef causes the __declspec(dllexport) to become enabled when CONSOLEAPPLICATION2_EXPORTS is defined. In the right area you can see the property pages for the DLL project where CONSOLEAPPLICATION2_EXPORTS is defined. When some other project uses this DLL’s header file, the CONSOLEAPPLICATION2_EXPORTS name won’t be defined and __declspec(dllimport) will be used.
The extern keyword is thrown in above and although it’s very important, it doesn’t matter for implicit linking. Yep, that’s right, you can use it or not and everything will work out fine. When we get to Explicit DLL Linking it will become very important.
If you compile your current project you’ll have a working DLL that has a function, a variable, and a class exposed.If you create a console application project within the same solution you can test the DLL.
DLL Implicit Linking
To add a new console application to your project right click on the Solution, choose Add, and then New Project. In the popup dialog choose Win32 Console Application. I’ve named my console application DLLTest (the project named ConsoleApplication2 is the DLL).
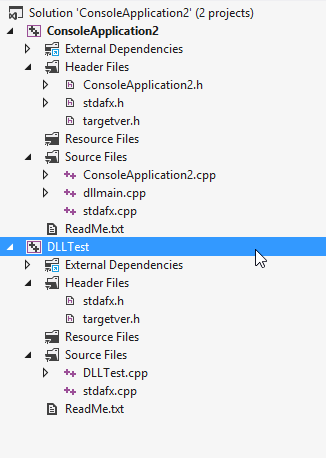
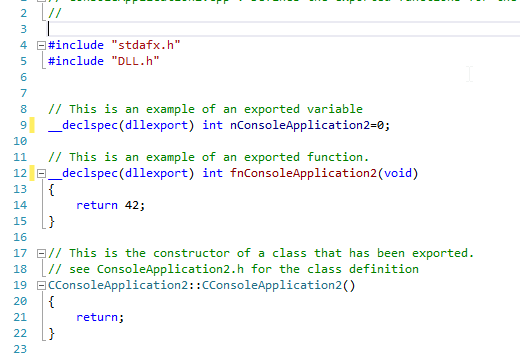
Since the DLLTest project doesn’t define the preprocessor macro CONSOLEAPPLICATION2_EXPORTS, the header will use the __declspec(dllimport) signature decoration. This makes sense because the DLLTest project will be importing symbols from the DLL. We used dllexport to export those same symbols earlier.
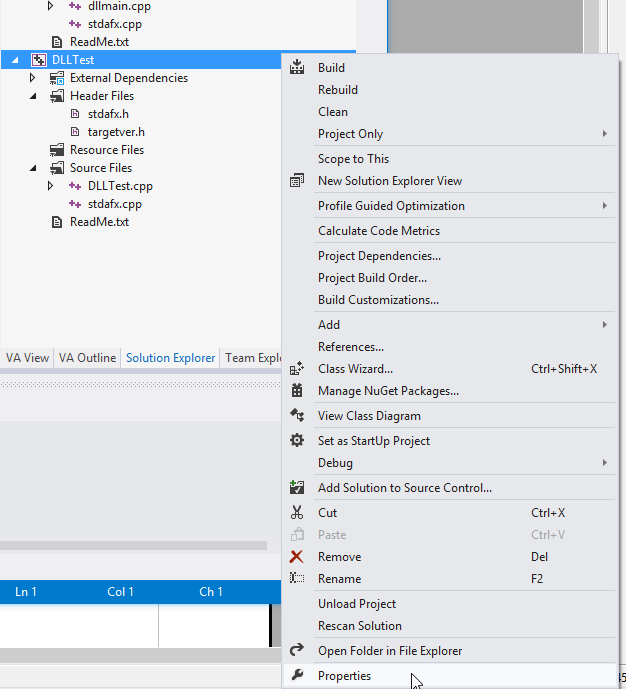
I’m going to rename the DLL to from ConsoleApplication2 to DLL since ConsoleApplication2 is sort of confusing (but was useful for distinguishing where the project name was used). Then, through right clicking on the DLLTest project, I’ll add a reference to the DLL by going to the Properties menu.
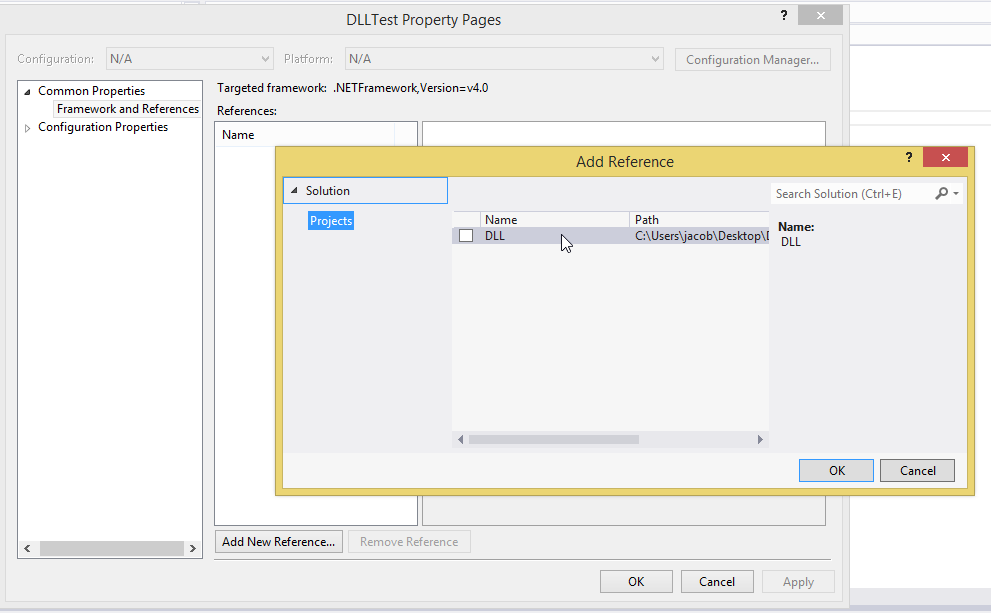
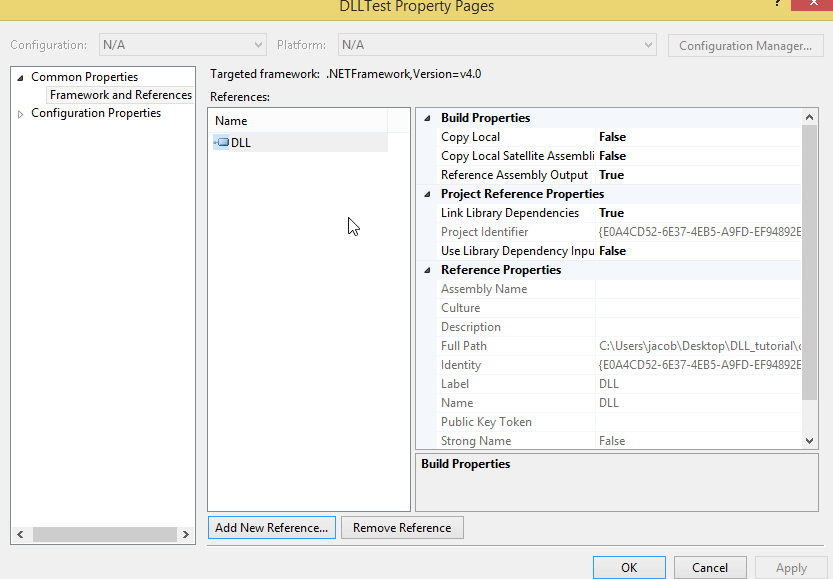
Clicking Framework and References under the Common Properties expandable tree menu makes the Add New Reference button available. I check the box next to the DLL (that’s the name of my DLL project now) and hit okay to get the project added to my References list.
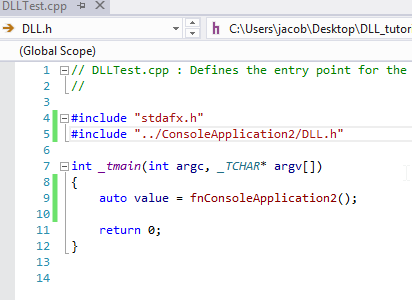
You can now use the DLL from your console application. To do that all you need to do is add an #include directive to the file that you want to call the DLL from. Since I only renamed the project and not the folder for my DLL the path is still via ConsoleApplication2. The double dots mean to go up one directory (just like if you were typing them into the terminal) and then look for the header in the subfolder named ConsoleApplication2. The following code worked fine for me and the value variable was set to 42 as would be expected based on the function definition we saw in the DLL code earlier.
The compiled test application only needs to be located in the same directory as the DLL that it’s referencing to be able to use it.
Implicit Linking From just a lib, header and DLL
I’m going to remove my DLL project from the solution with the test app. This will remove the reference from the References list.

I’m going to add the DLL’s .lib file to project by right clicking the project in the Solution Explorer window, choosing Add, picking Existing Item, and then selecting the DLL.lib file (from wherever it’s located, either the Debug or the Release folders). The lib file is called the Import Library and contains code that loads the DLL and helps your program find and use the contents of the DLL.
Now that my project has the lib file added to it, and the path to the header file is still valid (we added the header location to our test apps main cpp file earlier), the project compiles happily. To run the test app, the executable only needs to be co-located with the DLL. The lib and header files were only helpful for the compilation phase. The DLL isn’t necessary for compilation to work but it is necessary for running the application. That’s all there is to adding a DLL to your project when you only have the header, lib, and DLL files.
If you change the contents of the header or the lib without synchronizing the change with the other file then the compilation will fail with an error. As far as I can tell there is no interesting behavior that you can get by desynchronizing these files, the linker and compiler are just too good at error checking.
And now you know an introductory something about Implicit Linking and DLLs. Implicit Linking is the simpler of the two linking mechanisms, so stay tuned to up your DLL game with my upcoming Explicit Linking tutorial.
Troubleshooting
If you run your application and the OS complains that it can’t find your DLL there are only a few things that can be wrong.
- Since the OS searches for the DLL by name, the name must be the same as when the application that uses it was compiled.
- The DLL needs to be located within the search path that windows uses to find the DLL. For most purpose this can just be the same folder as the application.
- The DLL needs to compile to the same type of code that was present when the DLL was associated with the application. This means that if the DLL originally compiled to machine code that it can’t be switched with a version that was ported to bytecode.
Addendum
- It’s worth noting that __declspec starts with 2 underscores because that’s what the C++ standard dictates (Global Names: 17.4.3.1.2) for language extensions. A long time ago Microsoft thought that 1 underscore was okay but has since changed to 2 underscores to be compliant with the standard. Microsoft still supports its legacy decision of 1 underscore and the Microsoft compiler doesn’t currently see it as an error and will compile your DLL correctly.